Wednesday, September 4, 2013

BLTA: Bacon, Lettuce, Tomato and Avocado Sandwich.

Is there really anything else that I need to say? BLTs are amazing. Add avocado to that and it gets even better.


My son is on a bacon, egg and cheese sandwich kick. Don’t get me wrong, I love a bacon, egg and cheese sandwich but I don’t want them every day. So while my little man had his beloved sandwich for dinner, my husband and I had BLTAs.

These are really simple. Prepare your bacon of choice (ours was applewood smoked bacon this night). Toast your bread of choice (whole wheat sandwich bread). Slice your lettuce, tomatoes and avocado. Then assemble your sandwich. I don’t like condiments on my sandwiches, but my husband added mayo to his.

Enjoy!

Friday, August 30, 2013

Favors for pink baby shower.

My dear friend Amanda just had a baby girl a few weeks ago! A few months ago, I had the pleasure of hosting a baby shower for her. This was my first time hosting a shower for a baby girl and I was so excited.

I really wanted to have a favor that would be cute and useful. After many hours of research, I decided to do small bottles of hand sanitizer with a cute tag. As luck would have it, Bath and Body Works had their hand sanitizer on sale that week so I was able to get their cute, good-smelling version instead of just a regular, unscented bottle of hand sanitizer. I opted for only scents that were pink or came in pink bottles, of course.

For the tags, I used this tag template and cut the tags out of hot pink cardstock. I printed the message on plain white paper and then cut the notes into smaller rectangles that would fit on the tags. I attached the messages to the tags with a glue stick. I cut holes in the tag with a hole punch and then attached the tags to the bottles using pink ribbon.

They were a huge hit!


Tuesday, August 27, 2013

Homemade Croutons.

Hello again! It’s been awhile since my last post. Here in the south, we are experiencing the usual end of summer sweltering temperatures. At our house, that means we are enjoying meals that do not require the oven, which often includes a salad. And what goes perfectly with a salad? Croutons!

I’m pretty sure that croutons are my son’s favorite part of the salad. Let me just say that homemade croutons taste so much better than store-bought croutons. Store-bought croutons are just so dry and boring. Once you make your own croutons, it will be hard to eat the store-bought ones again!
I make my croutons in the skillet and they are ready to go in about 5 minutes. Many people make their croutons in the oven. I’ve tried that method and it works great. But again, I am trying to avoid the oven. Also, the oven method takes 20-30 minutes. When I’m trying to throw together a quick weeknight meal, I don’t have that sort of time.  Any leftover croutons can be stored in an airtight container; however, I enjoy them most when they are prepared right before I intend to serve them.
I really like the versatility of making my own croutons because I can flavor them to complement the other flavors in my salad.  On this particular night, I had some leftover romaine lettuce and a rotisserie chicken so we had caesar salad. I had about half a loaf of cheddar cheese bread from the grocery store bakery leftover from making cheesy garlic bread the night before (to go with spaghetti) so that’s what I used. Since the bread already had so much flavor by itself, I just added salt and pepper. But you can use any bread which makes this a great way to use up leftover bread. You can use any combination of dried herbs and/or garlic that you like. Sometimes I even like to add freshly grated parmigiano-reggiano right at the end of the cooking process.
Homemade Croutons
  • 3 – 4 slices of bread diced into cubes
  • 1- 2 tablespoons extra virgin olive oil
  • 1-2 tablespoons butter
  • salt and pepper
  • ½ teaspoon dried herb of choice or 1 clove garlic diced finely (optional)
Add butter and olive oil to a large skillet over medium heat. When the butter has melted, add the bread cubes, salt, pepper and any seasonings to the skillet and toss to coat. Cook 3-5 minutes, turning at least once, until croutons have reached desired level of browness/crispiness.
Store in an airtight container.


Monday, May 20, 2013

A Blue Baby Shower.

Here are some more pictures from the blue baby shower.
The blue dessert table.
Blue Lollipop Favors.
Blue punch and cucumber water.
Food table.
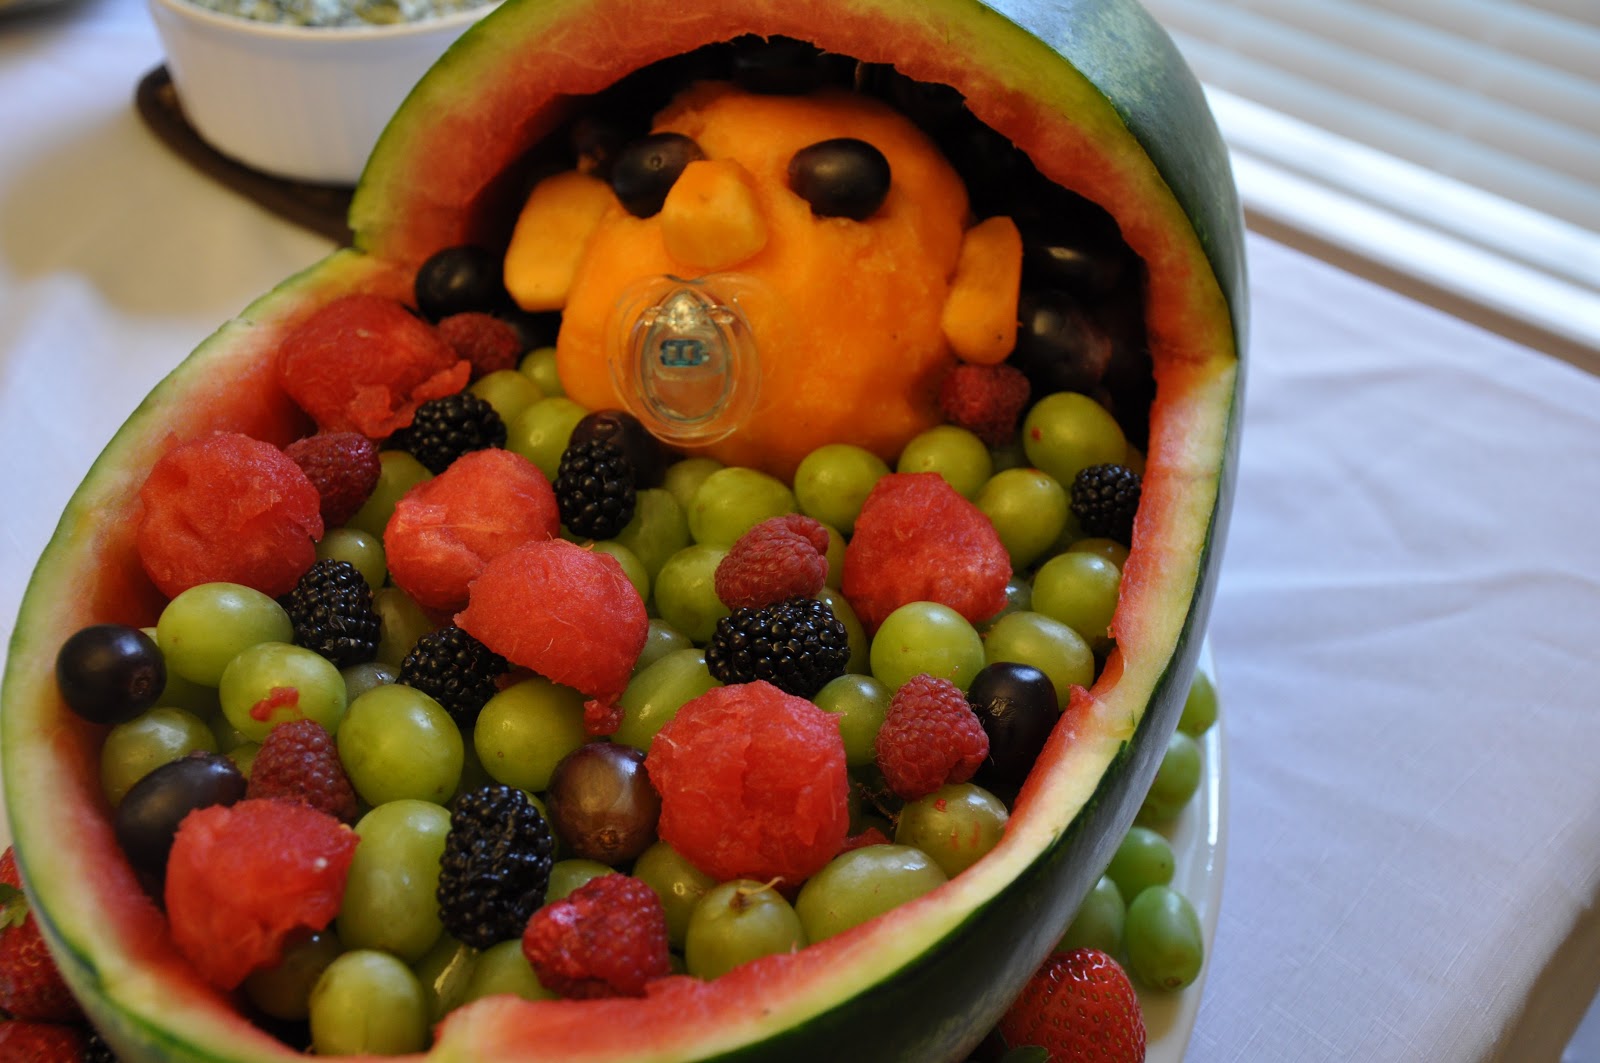
Look at this cute fruit bowl one of my co-hosts made.
Isn’t is adorable?!

I just hosted a pink baby shower so I will have pictures posted soon!


Wednesday, May 15, 2013

Cupcake Toppers for a Blue Baby Shower.

For the blue baby shower I hosted for my dear friend, I decided to make cupcake toppers to decorate the cupcakes with. These were really easy to make. She had already chosen her baby boy’s name so I was able to incorporate his name into my toppers.
To make the cupcake toppers, I printed the letter “G” and the name “Garrett” in blue, size 48 font, leaving space in between the letters and words so that there would be room for the circles. Then I used a scalloped edge 1 ½ inch round punch and punched out all of the letters and names. Next, I used a 2 inch round punch and punched out the background circles in blue cardstock. Then I attached the small circles to the blue cardstock. I used a non-toxic glue stick. Once those were dry, I attached the lollipop stick to the circle. I used regular non-toxic school glue for this. The tricky party is being sure that the stick is lined up correctly with the letter/name on the circle so the letter/name would be straight when it went into the cupcake.
I decided to make my cupcake toppers two sided since my dessert table was set up so that people could walk around the table and I didn’t want the backside of the cupcakes to be undecorated. To do this, I simply punched out double the letters, names and blue circles. Once the first circle had been attached to the stick and the glue dried, I simply turned it over and added the second circle.
Then I pushed them into the center of the cupcakes for an adorable and personalized decoration!
Enjoy!


Friday, May 10, 2013

Diaper Wreath.

I hosted a baby shower for a dear friend a few months back. I usually make diaper cakes for baby showers but this time around I decided to make a diaper wreath instead. This was actually very easy and I was so pleased with how it turned out.
This is what you will need:
·         Diapers- I used about 36 size one diapers. I used the Target brand diapers that had blue, green and gray stars since the diapers would be seen but you can choose any brand/pattern that works for you.
·         One metal wreath form.  You can do any size that you like. I opted for a 20 inch one.
·         Ribbon for attaching the diapers to the wreath. You could also use rubber bands.
·         Tulle/Ribbon for decorating and bow.
First, wrap the diaper around the wreath form so that the wreath form is inside the diaper. The top of the diaper should be on the outer ring of the wreath and the bottom of the diaper should be on the inner ring. Gather the top of the diaper together and secure with a ribbon. Repeat with each diaper, slightly overlapping the next diaper over the last one added.
Once all of the diapers have been added the wreath form should not be visible and it will look like this (pardon the mess on my table!):
Now comes the decoration part. I used two different colors of blue tulle to wrap around the diapers to cover up the ribbons used to secure them to the wreath form. I simply took one color and wrapped it over one diaper and then under the next, all the way around the wreath. With the second color, I wrapped it over the remaining diapers and under the diapers with the first color on top.
Once  both colors are added it should look like this. 
 Next, I added a tulle bow.
Here’s the finished product hanging on my front door with a sign with the baby’s name in the middle.
I wish I would have made the sign a little bit bigger but I didn’t realize how small it looked with the giant wreath until about 10 minutes before everyone arrived. Oops! I’ll do better next time!
Enjoy!

Wednesday, April 24, 2013

Peanut Butter Cup Cupcakes.

Peanut butter cups are one of my favorite desserts. So when we had cupcakes at a recent work event and I was excited when I saw peanut butter cup cupcakes on the dessert table. But I found the peanut butter cup cupcake to be disappointing. It was very dry and lacked any real chocolate or peanut butter flavor. In the following days, I just couldn’t get that subpar cupcake out of my mind. Sad, isn’t it? So I decided that I could do better and set out to make an extraordinary peanut butter cup cupcake.
As soon as I saw this recipe on Two Peas that included a full peanut butter cup in the cupcake, I knew my cupcake mission would be a success. I used their peanut butter frosting recipe as well. I love Hershey's “Perfectly Chocolate” Chocolate Cake recipe so I used that in place of the one in the Two Peas’ recipe. Really any chocolate cupcake recipe, or even a cake mix, will work. These do take a bit of time to assemble but it is well worth it.
 So how do you get that full size peanut butter cup in the cupcake?
Simply pour a small scoop of batter into each cupcake liner, place the peanut butter cup butter on top of the batter and then add remaining batter to the cupcake liner, covering the peanut butter cup.
Bake the cupcakes according to your cupcake recipe. Mine were in the oven for 20 minutes. When you take them out of the oven, they look like normal chocolate cupcakes.
I just got a new cupcake carrier. Isn’t this so neat?
It's easy to carry and I really like how the holders stack together.
Once the cupcakes are cool, mix up your frosting and try not to eat it all.  
I made about 30 cupcakes to take to work and this frosting recipe made enough for all of my cupcakes. Although, I’m a fan of mounds of icing on cupcakes so if you are more liberal with your frosting you might need to double the recipe, depending on the number of cupcakes you make.
Don’t these look delicious?!?!
There wasn’t a single cupcake left when I took these to work. That’s always a good indication of whether a new recipe was a success. Mission accomplished!
Enjoy!

Peanut Butter Cup Cupcakes
Adapted from Two Peas


Full size peanut butter cups, unwrapped (one for each cupcake)
Chocolate cupcake batter (see recipe below)
Peanut butter frosting (see recipe below)
Mini peanut butter cups for garnish, if desired
 
Preheat oven to 350 degrees and line a muffin pan with cupcake liners. Pour a spoonful of batter into prepared cupcake liners. Place full size peanut butter cup in the cupcake liner and then add remaining batter, filling cups 2/3 full with batter.   Bake 22 to 25 minutes.
Once completely cooled, frost the cupcake with peanut butter frosting. Top each cupcake with a mini peanut butter cup if desired.

Hershey's “Perfectly Chocolate” Chocolate Cake
Makes about 30 cupcakes


2 cups sugar
1-3/4 cups all-purpose flour
3/4 cup cocoa
1-1/2 teaspoons baking powder
1-1/2 teaspoons baking soda
1 teaspoon salt
2  eggs
1 cup milk
1/2 cup vegetable oil
2 teaspoons vanilla extract
1 cup boiling water
Stir together sugar, flour, cocoa, baking powder, baking soda and salt in large bowl. Add eggs, milk, oil and vanilla; beat on medium speed of mixer 2 minutes. Stir in boiling water (batter will be thin).

For the Peanut Butter Frosting from Two Peas:
1 cup unsalted butter, at room temperature
1 cup of cream peanut butter
2 1/2 cups powdered sugar
1 tablespoon heavy cream
In the bowl of a stand mixer, beat butter and peanut butter until creamy. On low speed, add in powdered sugar. Mix until combined and add the heavy cream. Mix until frosting is fluffy.